Embrace the Harvest: Gathering Your Cannabis Rewards
Discover the Complete Guide to Cannabis Harvesting and Post-Harvest Procedures.
Contents:
- When is the right time to harvest?
- Fan leaves will start to yellow
- Trichomes begin to change in appearance
- Calyxes become plump
- Pistils develop a darker colour
- Try a progressive harvest when lower buds aren’t fully ripe
- It’s time to trim your flowers
- Dry your buds
- Cure your cannabis for smoothness
Harvest time is an exciting milestone, but the journey isn’t over just yet. Before you can enjoy your buds, there are crucial steps to take. Trimming, drying, and curing are essential to ensure a delightful smoking experience. By putting in the effort now, you can eliminate harsh flavors and extend the longevity of your stash.
Harvesting is more than a simple pluck and dry routine. Timing plays a crucial role, influencing THC levels in your buds. Proper curing, maintaining the right humidity, significantly impacts mold resistance. Explore the nuances of the harvest process for the finest cannabis experience.
This comprehensive guide will walk you through every step of the harvest process, guaranteeing a robust and potent stash.
WHEN IS THE RIGHT TIME TO HARVEST?
The initial step in the harvest process involves carefully removing flowers and branches from your plants. However, determining the ideal timing for this task can be a crucial decision. The moment of harvest significantly impacts the characteristics of your flowers, including their taste and psychoactive effects.
While each strain has an estimated flowering time, it’s important to note that environmental factors can influence this timeframe. Indica strains tend to mature more quickly, typically flowering for 6-8 weeks, whereas sativa strains often require 8-12 weeks for optimal development.
Recognizing the signs of approaching harvest doesn’t solely rely on guesswork. By understanding the anatomy of the cannabis plant, growers can observe distinctive transformations that occur as the plant matures. These botanical landmarks serve as reliable indicators, allowing you to make informed decisions. Familiarizing yourself with specific tissues, glands, and organs will enable you to identify the relevant changes and effectively monitor the progress of your plants.
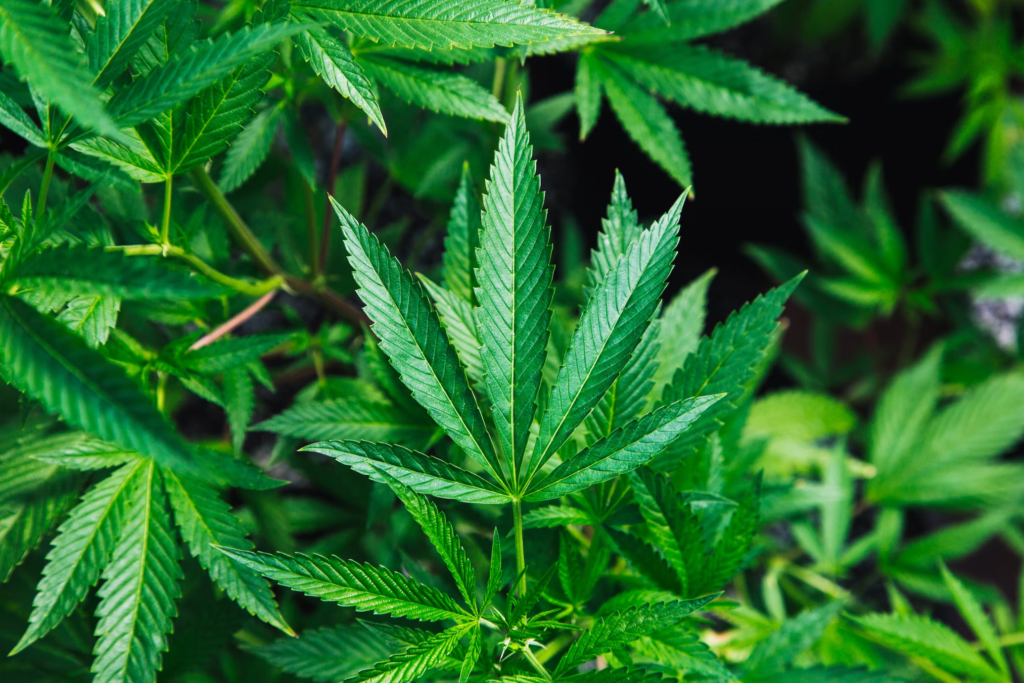
FAN LEAVES WILL START TO YELLOW
While yellow leaves typically indicate nutritional deficiencies or the presence of pathogens, they are actually quite normal during the late flowering stage. Fan leaves, which are the large and broad leaves that develop during the vegetative phase, serve as organic solar panels, converting light into essential sugars for energy. As harvest approaches, these leaves will naturally begin to turn yellow and may even fall off. This process is nothing to be alarmed about, as it signifies that the plant is prioritizing energy allocation towards the flowers by redirecting resources from these leaves.
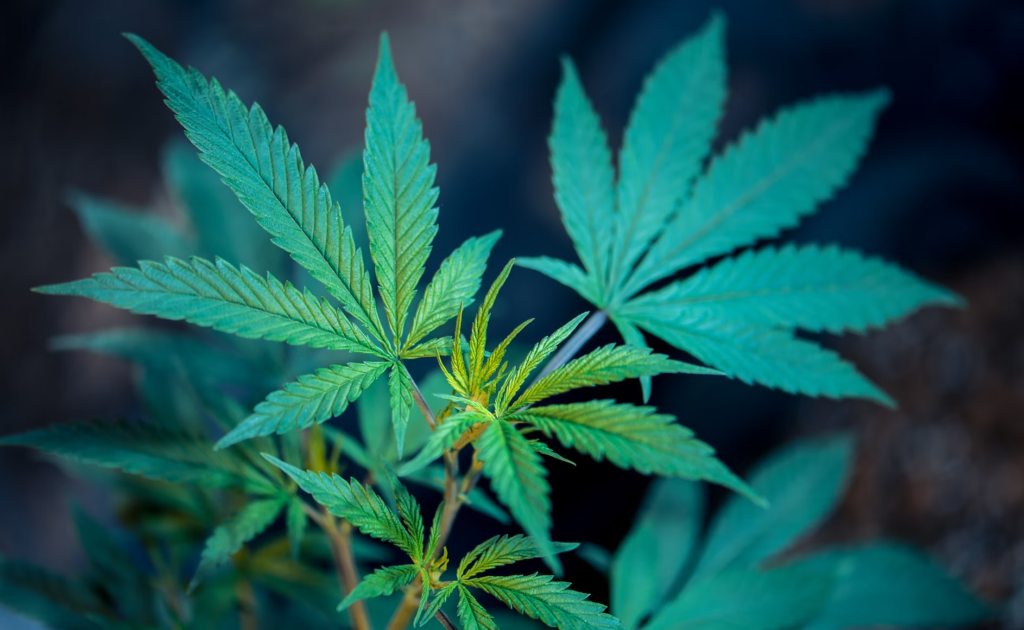
TRICHOMES BEGIN TO CHANGE IN APPEARANCE
Trichomes, those minuscule mushroom-shaped glands present on sugar leaves and flowers, play a crucial role in the production of cannabinoids and terpenes. They serve as tiny chemical factories, producing a sticky resin that offers protection against heat, predators, and pests in nature. However, for growers, this resin is the prized outcome of cultivating cannabis.
By monitoring trichomes, growers can accurately gauge the ripeness of their flowers. This allows them the flexibility to harvest at a timing that aligns with their personal preferences and desired effects. Trichome observation grants valuable insights into the optimal harvest window.
Trichomes are visible to the naked eye, but to properly analyze them, a magnifying device is required. A simple and affordable magnifying glass is often sufficient and popular among budget-conscious growers. Photography enthusiasts with a knack for gardening can capture detailed snapshots using a macro lens, allowing them to monitor color changes over time. For commercial growers or those with a larger budget, a microscope is an option. These high-quality devices provide an exceptionally detailed view of trichome structure and coloration.
During the early stage of flowering, trichomes appear clear and translucent, indicating their youth and low cannabinoid production levels. Additionally, the flowers will be relatively small in size, serving as a clear indication that it is not yet time for harvest.
As time progresses, the appearance of these glands undergoes a transformation, transitioning into a cloudy or milky color. This change in complexion signifies a higher production of cannabinoids. It is crucial to closely monitor these structures as the milky color becomes more prominent. Trichomes reach their peak THC production when more than half of the glands have turned cloudy. Harvesting the buds during this period will result in a potent cerebral high characterized by euphoria and increased energy.
For those seeking a more calming and relaxing experience when consuming cannabis, it is advisable to wait until the trichomes display an amber color. This indicates reduced levels of THC and increased concentrations of CBN, a cannabinoid that is produced as THC naturally degrades over time.

CALYXES BECOME PLUMP
The calyx is the initial component of a cannabis flower that emerges from the node. Initially appearing as a cluster of small leaves, it gradually unfurls into fully developed flowers. Calyxes remain positioned at the base of each bud and serve as the housing for reproductive organs. They are notably abundant in resin and play a crucial role in providing structural support, safeguarding the buds against strong winds or avian predators.
As the buds approach maturity, the calyxes begin to enlarge. This expansion is in preparation for potential seed development in the event of successful pollination by a male plant. It is recommended to regularly inspect the size of the calyxes using a magnifying tool to monitor their progress.

PISTILS DEVELOP A DARKER COLOUR
Pistils, also known as stigmas, are the delicate, antenna-like sexual organs that emerge from the calyxes of cannabis flowers. Their primary function is to capture pollen released by male plants, initiating the process of fertilization. If successful, the female plants will proceed to produce seeds.
While most growers aim to prevent fertilization in order to cultivate seedless flowers, pistils still serve as a valuable indicator of maturity. In the early stages, pistils appear bright white and gradually darken as they mature, eventually transitioning to an orange-brown hue. When approximately 70% of the pistils have changed color, THC production tends to reach its peak. As the majority of pistils darken, around 90%, THC levels decline while CBN levels increase. It’s important to note that these percentages serve as general estimates and may vary.
TRY A PROGRESSIVE HARVEST WHEN LOWER BUDS AREN’T FULLY RIPE
If you find yourself in a situation where the flowers near the upper canopy of your plants are fully mature with cloudy and amber trichomes, while the crystals on the lower buds are still clear and far from readiness, you can employ a technique known as progressive harvesting. This method, also referred to as partial harvest or staggered harvest, allows you to ensure that every portion of your cannabis is perfectly ripe before chopping.
The concept behind progressive harvesting is straightforward and surprisingly simple. All you need to do is clip off the individual buds that have reached maturity, trimming back the remaining branches and leaves as necessary to expose the less mature flowers to more light. Keep a close eye on these younger buds and watch for the signs that indicate they are ready to be harvested. By using this technique, you can maximize the overall quality of your yield and ensure that each portion of your crop is harvested at its peak.
Typically, indoor plants can benefit from two cycles of progressive harvesting, spaced approximately two weeks apart. However, larger plants may require additional cycles to ensure optimal maturity.
It’s important to note that most plants tend to mature from the top down due to the increased light exposure in the canopy, which promotes faster ripening. However, each plant is unique, and you may encounter a particular phenotype that matures from the bottom up, deviating from the norm. Additionally, there are plants that mature evenly from top to bottom, making them unsuitable for progressive harvesting. Understanding the individual characteristics of your plants will help you determine the most suitable harvesting approach.
IT’S TIME TO TRIM YOUR FLOWERS
The next step in the process is trimming, also known as manicuring. This essential task involves tidying up the buds and removing excess sugar leaves to ensure a cleaner final product. To perform trimming, you’ll need a worktop, a tray, latex gloves, and a pair of scissors. There are two main methods for trimming: wet trimming and dry trimming.
Wet trimming involves manicuring the flowers immediately after harvest, while they still have a high moisture content. This approach helps minimize the risk of mold formation by removing all sugar leaves before drying, thus preventing trapped moisture. However, wet trimming can be quite sticky, so wearing gloves is essential. On the bright side, the resin that sticks to your trimming tools can be collected to make scissor hash, providing an additional benefit to the process.
Dry trimming is a technique that involves manicuring your flowers after they have been dried. This method is preferred when you’re working in a low humidity environment with reduced risk of mold. Dry trimming also tends to result in tighter and more compact buds, which many growers find visually appealing.
Whether you choose wet trimming or dry trimming, the basic task remains the same. You can decide to trim off the sugar leaves while the buds are still attached to the branches, or you can individually remove the buds and trim them separately. It’s recommended to save the sugar leaves, as they can be used to make hash and other extracts, maximizing the use of your plant material.
DRY YOUR BUDS
The next step is to transfer your harvest to the drying room. Properly drying cannabis is crucial to remove moisture from the buds’ surface and prevent the formation of mold. Additionally, smoking damp weed is not enjoyable. Before you start the drying process, designate a dedicated space for this purpose. It could be a spare room or even the same grow tent you used for cultivation. If you have harvested your flowers on branches, you will need to set up a clothesline or similar setup to hang them. Alternatively, if you have individual buds, you can place them on a drying rack.
For optimal results, it is important to dry cannabis slowly. While it may be tempting to expedite the process by using an oven, this can negatively affect the taste. Terpenes, the compounds responsible for the flavorful aroma of cannabis, are volatile and can degrade at high temperatures. To initiate drying, aim for a room temperature of approximately 21°C (70°F) and a relative humidity of around 50%. It is recommended to use a hygrometer to monitor these factors in your drying space. If the humidity or temperature levels are too high, utilize fans, air conditioning, and a dehumidifier to create a drier environment. Conversely, if the levels are too low, consider using a heater and a humidifier to increase humidity.
The drying process typically lasts for about 2-7 days. It’s important to closely observe your flowers every day and assess their moisture levels by gently touching them. As the drying progresses, the stems and flowers should become more brittle and snap easily when pressure is applied, rather than bending. Once you notice this snapping behavior, it indicates that the drying phase is complete, and you can proceed to the next step.
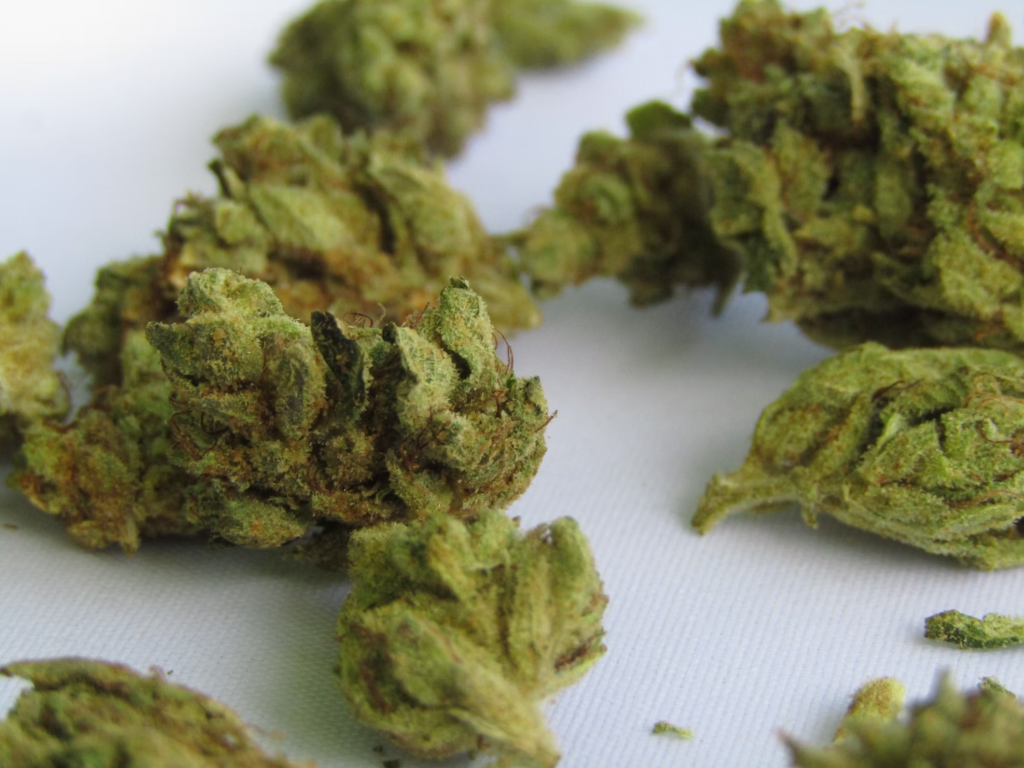
CURE YOUR CANNABIS FOR SMOOTHNESS
Have you ever experienced the unpleasant sensation of smoking visually appealing weed that leaves your throat feeling raw? This is often the result of cannabis that has not been properly cured. While curing does add extra time to the overall growing process, it significantly enhances the quality of the harvest. Curing is a prolonged process that goes beyond simple drying, as it focuses on removing moisture from the inner parts of the flowers.
By allowing your cannabis to undergo the curing process, you can greatly improve its flavor and enjoy a smoother and more enjoyable smoking experience. During curing, certain molecules like chlorophyll that can cause irritation to the respiratory system are broken down, resulting in a more pleasant smoke. The additional time invested in curing is well worth it for the enhanced qualities it brings to your harvest.
Curing your harvest not only improves the flavor and smoothness of your cannabis, but it also enhances its potency. Prior to consumption, THC in the form of THCA (cannabinoid acid) is present in the buds. Through the process of decarboxylation, which occurs under high temperatures or over time, THCA is converted into THC. Curing plays a role in facilitating this transformation, gradually increasing the THC levels.
The curing process is relatively straightforward and requires a few mason jars, enough to accommodate your entire harvest. Once properly sealed, you can set aside the jars and allow the curing process to unfold. It’s a set-and-forget approach, allowing time to work its magic on your cannabis.
Fill each jar loosely, leaving about 75% of capacity, and seal them tightly before storing them in a cool, dark location. Initially, you’ll notice that the remaining moisture within the buds will redistribute, giving the impression of rehydration. To release this moisture and allow for fresh air circulation, practice “burping” the jars by opening them for a few minutes multiple times a day. Repeat this process throughout the first week.
During the second and third weeks, you’ll only need to open the jars once a day for a few minutes as the moisture content continues to decrease. After three weeks, your flowers will be sufficiently cured, providing a smooth smoking experience. Some patient growers choose to extend the curing period up to eight weeks to maximize flavor and potency. If long-term storage is your goal, rest assured that you can cure your cannabis for over six months without compromising its quality.
Part 1: The Seed Germination Phase. Ensure optimal conditions for your seeds’ early development by exploring our comprehensive guide on seed germination techniques.
Part 2: The Vegetative Growth Phase. Witness the emergence of sprouted seeds as they burst forth from the soil and embark on rapid growth.
Part 3: The Cannabis Flowering Phase. After a few more months of blooming, the time will come to retrieve our pruning shears from the cupboard.
Part 4: The Final Weeks of the Flowering Stage. After weeks of growing anticipation, the highly anticipated harvest is now just a stone’s throw away.