Mastering the Art of Cannabis Bud Curing: A Step-by-Step Guide
Following meticulous months of cultivation, dedicating a few additional weeks to the curing process is a minor endeavor. However, it holds immense potential as it can convert rough and moist buds into aromatic and flavorful flowers.
While the harvest may appear to be the ultimate culmination of the growing journey, it is far from the truth. Once you have reaped the fruits of your labor, the subsequent stages of drying and curing take center stage as the most crucial steps.
Drying is precisely what it implies: the procedure of eliminating a significant portion of moisture from your buds. This practice renders them more manageable, less susceptible to mold formation, and significantly enhances their smoking experience. While some growers are content with consuming dried buds, if you aspire to elevate the flavor and potency of your harvest to new heights, curing is indispensable.
Contents:
- Benefits of Curing Your Cannabis Buds
- Factors Influencing the Curing Process
- Optimal Methods for Curing Your Cannabis Buds
Benefits of Curing Your Cannabis Buds
In various aspects of life, patience proves to be a valuable trait, and the same applies to the art of cannabis curing. Curing is a time-consuming process that requires several weeks to reach completion. Although it may initially seem inconvenient, the reality is that curing has the power to transform harsh buds into ones that offer a smooth and delightful smoking experience. The key lies in the breakdown of byproducts generated during the drying phase, such as sugars. These molecules can impart an unpleasant and harsh taste. Through the process of curing, these compounds are gradually eliminated, resulting in a buttery smooth smoke.
Additionally, curing plays a crucial role in preserving the desirable flavors of cannabis. The aromatic molecules responsible for the intense and distinctive flavors of different strains are known as terpenes. These volatile compounds are prone to degradation under high heat, making gentle drying and prolonged curing the ideal approach for achieving buds with tantalizing flavors.
Curing has more than just flavor benefits; it can also elevate the overall cannabis experience. THC, the primary psychoactive compound in cannabis, naturally degrades over time and transforms into CBN, a cannabinoid with distinct effects that differ from THC.
Furthermore, proper curing significantly extends the shelf life of your harvest and reduces the risk of mold formation. By following correct curing and storage practices, your buds can maintain their taste and potency for a year or even longer without any noticeable decline.
Factors Influencing the Curing Process
Prior to delving into the specific methods of curing your cannabis buds, it is crucial to explore the various factors that impact the process. This understanding will provide you with valuable insights into the desired outcomes to strive for and potential pitfalls to steer clear of.

💡 Shield Your Cannabis: Preventing Light Exposure
Throughout the curing process, it is imperative to store your stash in a dark environment. Light is a significant factor that can cause the degradation of crucial compounds like THC and terpenes. To prevent light from compromising the flavor and potency of your buds, ensure they are kept in a dark cupboard or box. Alternatively, employing miron glass jars, which filter out all visible light except violet, provides an extra layer of protection for your precious flowers.
🌡️ Safeguard Your Stash: Shielding it from Heat
Heat primarily becomes a significant concern in regions with exceptionally high temperatures. It is worth noting that heat can contribute to the degradation of cannabinoids, potentially diminishing the potency of your buds. To mitigate the risks, it is crucial to store your jars in a cool location to minimize damage and prevent the formation of mold. Maintaining an optimal room temperature of around 21°C is ideal for the curing process.
🌫️ Discovering the Optimal Humidity Level
The curing process is a straightforward endeavor when commencing with appropriately dried buds. However, if your stash retains excessive moisture before curing, the buds may clump together, creating a favorable environment for mold growth. Moreover, increased moisture can encourage the growth of anaerobic bacteria, leading to the breakdown of your precious stash. An indication of this occurrence is the emergence of an ammonia-like odor when opening the jars.
Conversely, curing overly dry buds will result in a crumbly and harsh stash that lacks an enjoyable smoking experience. Ideally, cannabis flowers should be dried in a room with a humidity level ranging from 45% to 55%. This will yield a dry and slightly crumbly exterior while maintaining a slightly more humid interior. Once the curing phase begins, the humidity should be slightly increased to an optimal level of around 62%.
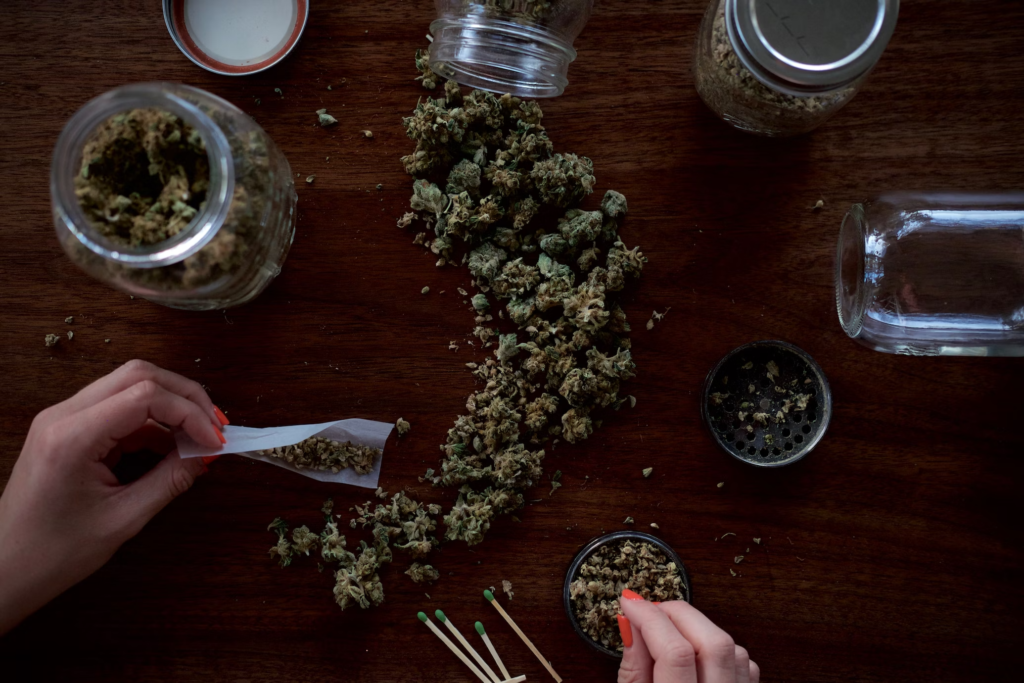
Optimal Methods for Curing Your Cannabis Buds
With these essential factors in mind, you are well-equipped to embark on the curing process. In essence, curing entails the precise timing of opening and closing jars. By carefully placing your dried cannabis flowers into airtight glass mason jars, you establish an environment that can be effectively controlled. These sealed containers enable the humidity from within the flowers to gradually rehydrate the exterior, striking a perfect balance without making the buds excessively damp. Ultimately, the desired outcome is a stash that delivers a smooth smoking experience and unrivaled flavors.

Step 1: Trimming Your Buds

To initiate the process, it is essential to prepare your flowers appropriately. If you dried your buds individually, you are ready to proceed. However, if you opted to dry them on the branch, some trimming is necessary. Carefully separate each bud and remove any sugar leaves attached to them.
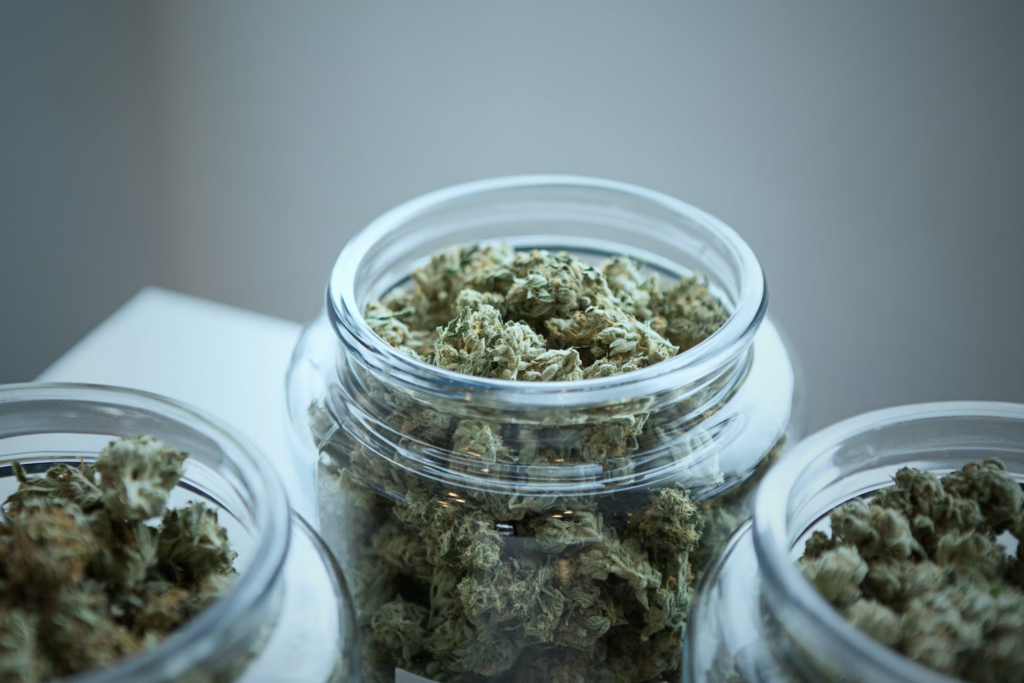
Step 2: Stashing Your Flowers

Subsequently, transfer your stash into airtight containers, with mason jars being a reliable choice that enables growers to observe their buds effortlessly during the curing journey.
Loosely place the buds inside the container, filling it up to approximately 75% capacity, ensuring there is sufficient space for air circulation. This is an opportune moment to assess if your stash has reached the appropriate dryness for curing. Gently shake the jars. If the buds freely rattle around inside the glass, you can proceed to the next steps. However, if they tend to clump together, it indicates that the exterior is still too moist, necessitating further drying before continuing.
Step 3: Curing Your Weed With Optimal Humidity

Secure the lids onto your jars and carefully position them in a cool and dark space to shield against the potential risks highlighted earlier. It is advisable to store them in a cupboard or dedicated storage area where the temperature stays around 21°C and the relative humidity inside the jars ranges from 60% to 65%. To ensure accurate monitoring of these conditions, consider adding a small hygrometer to each jar—a device designed to measure humidity accurately.
Step 4: Regulating Humidity Levels
During the initial days, it is crucial to check on your buds approximately twice a day. Observe them through the glass and remain vigilant for any signs of mold formation. Additionally, when inspecting, open the lids of the jars for a few minutes to facilitate fresh air exchange. Keep a close watch on the hygrometer readings. If the humidity level registers between 60% and 65%, continue with your regular routine. In the event that the buds become excessively damp, leave the lids off the jars for about 3 hours to allow excess moisture to escape. Conversely, if the humidity is too low, keep the lids on for extended periods without ventilation breaks. Should you still observe insufficient humidity, consider placing a small humidity pack inside the affected jars.
Step 5: You’re Almost There
For the next two weeks, ensure that you open the jars once a day while diligently upholding optimal humidity levels. As the days pass, your buds will gradually mature and become thoroughly cured, making them ready for an enjoyable smoking experience. However, those with a penchant for patience will reap the greatest rewards. By allowing your flowers to undergo an extended curing period, lasting up to six months, their quality will continue to improve, resulting in an even more exceptional cannabis experience.